Friday, June 1, 2012

Queue Best Practice


Create queues to help your teams manage leads, cases, and custom objects. Once records are positioned in a queue either manually or through an automatic case- or lead-assignment rule, records stays there until they are assigned to a user or taken by one of the members of the queue. Any queue member or users above them in the role hierarchy can acquire ownership of records in a queue.

     While creating a queue select Send Email to Members to individually notify all queue members and the specified Queue Email address when new records are placed in the queue. If this checkbox is not selected, only the Queue Email address is notified. If a Queue Email address is not specified, individual queue members are always notified of new records, regardless of this checkbox setting.

        When you create a queue, Salesforce.com automatically creates a corresponding list view. Users can access the queue list view from the Cases, Leads, or custom object tabs. Only queue members and users above them in the role hierarchy have access to that queue list view, depending on your sharing settings.

You cannot delete a queue if it is used by an assignment rule or has any records in it.

Salesforce Interview Questions

Salesforce Interview Questions:
  • 1.       How can we change standard Date format in to Salesforce and Local?
  • 2.       Difference into Action Support and Action Fuction?
  • 3.       Difference into Command Lind and Command Button?
  • 4.       Security in Salesforce?
  • 5.       Inline Visual force page?
  • 6.       How to remove redundancy in List?
  • 7.       If we are writing Global class how we can secure to external user?
  • 8.       Junction object.
  • 9.       How we can create custom field from page layout?
  • 10.   Lead conversion
  • 11.   Can we create contact without account? 
Other Questions:
  • 1.       What is Field Set and why we are using this?
  • 2.       Permission set
  • 3.       Trigger context and class context
  • 4.       What are partner and Enterprise WSDL?
  • 5.       What is difference between ActionFuction and ActionSupport?
  • 6.       Report
  • 7.       Ajax Toolkit- Custom button ajax
  • 8.       Criteria based sharing
  • 9.       Record sharing and types
  • 10.   Profile and role
  • 11.   Customer Portal and Self service portal
  • 12.   Type of relationship in soql
  • 13.   What are the types for run Batch class?
  • 14.   Dynamic Apex like Apex Describe information
  • 15.   Remote Action in apex.
  • 16.   View state
  • 17.   Pagination in Visual force page
  • 18.   Can we use trigger.new in After Delete trigger?
  • 19.   Future methods and limitation.
  • 20.   What is difference between Sales Team and Account Team? 

How to configure Mail Merge


The Salesforce.com Mail Merge feature can be a lifesaver if you want to make a letter, direct mail piece, invoice, proposal, or even a contract in Microsoft Word using data from your records in Salesforce. If you have created form letters, labels or envelopes in MS Word from a database or Excel file, Mail Merge for Salesforce works in a similar fashion.
At a high level, you install a Salesforce plugin for Microsoft Word, you create your template in Word and upload the template into Salesforce.com so that it can be accessed using the “Mail Merge” button in you Activities History related list.
Mail Merge Button
Creating Mail Merge Templates
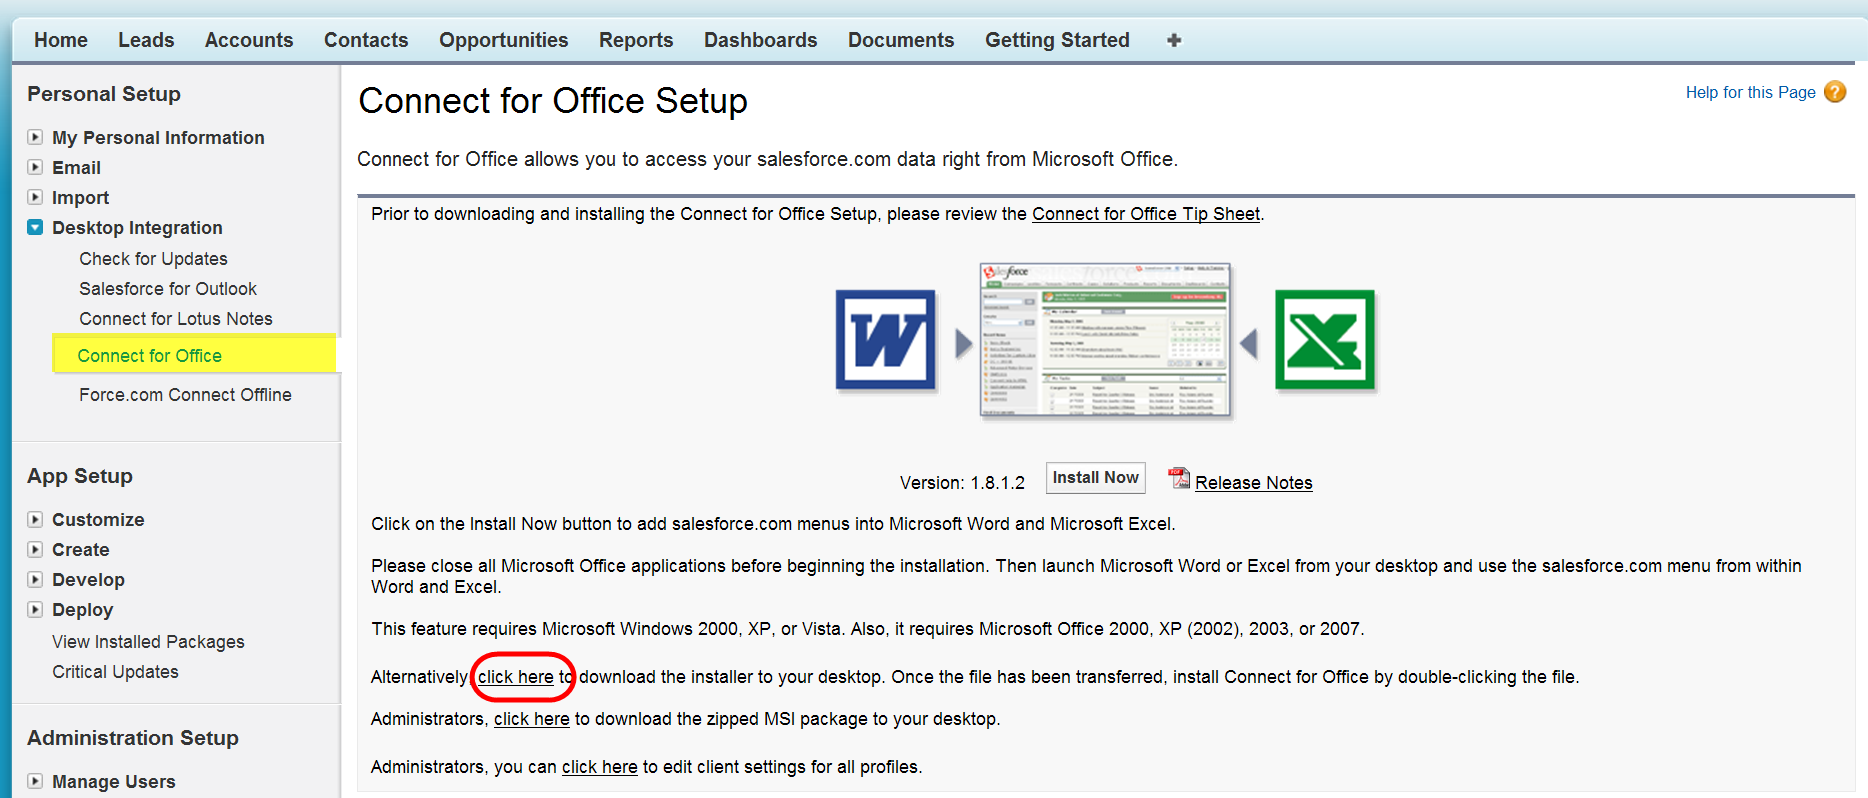
Install the Desktop Integration Plug In from Salesforce.com. Go to Setup > Personal Setup Desktop Integrations > Connect for Office
Download Mail Merge PlugIn
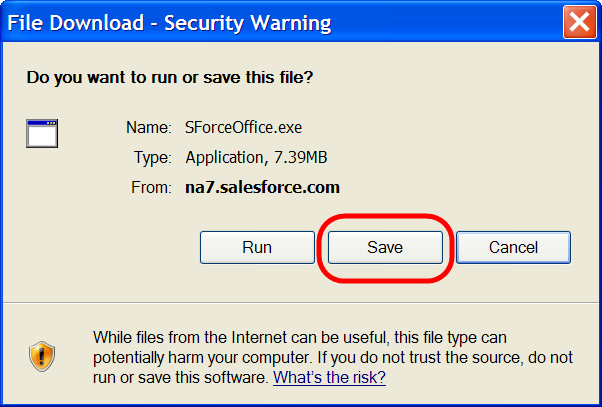
For reliability I prefer to use the link to download the installer locally.
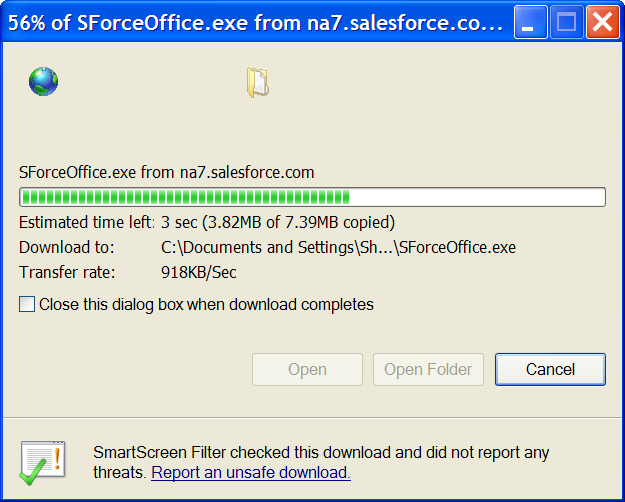
Download Plugin Local Download to Desktop
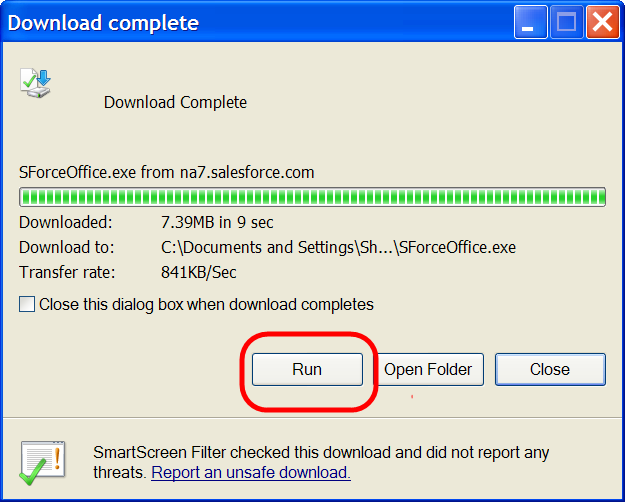
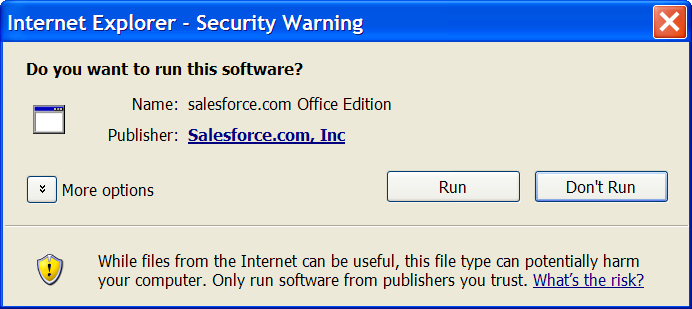
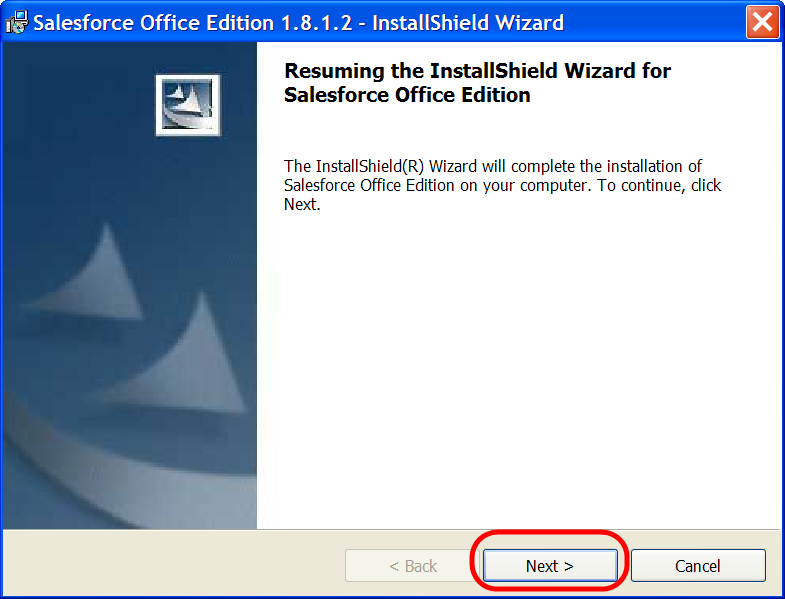
Shut down anything that could be considered part of the Microsoft “suite” – specifically MS Outlook and MS Word. Then run the plug-in:
Run Installer Run Installer

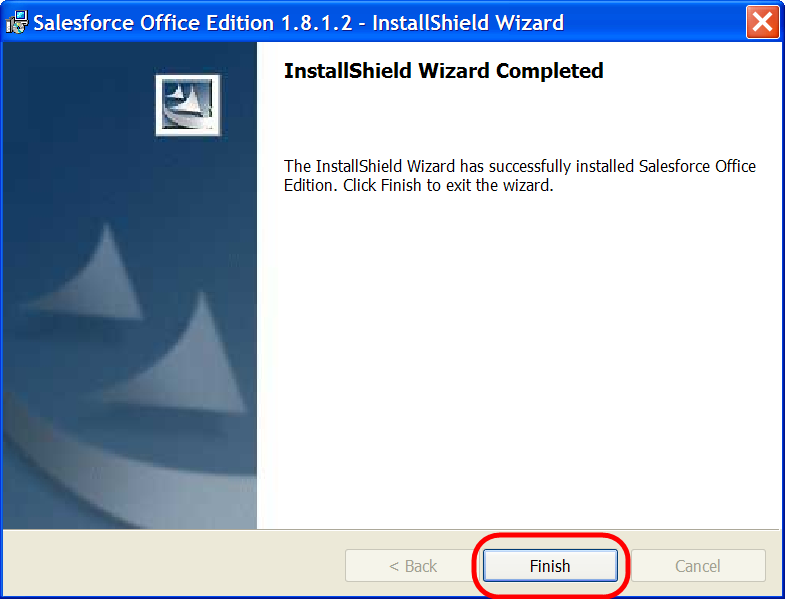
Continue Install Finish Install
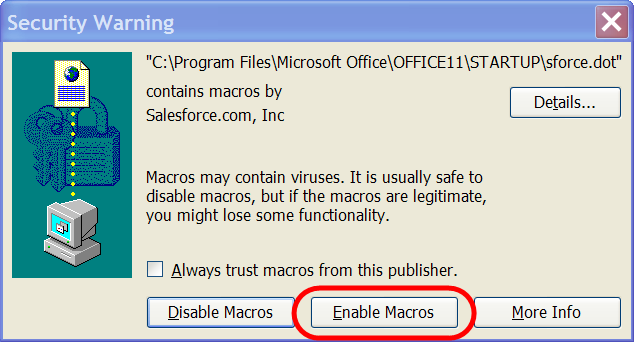
Start MS Word – you might get a message similar to the below:
Enable Macros
You should see a new set of tools in the toolbar of Word:
New toolbar option
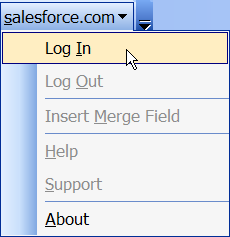
When you click the Salesforce.com option – select “Log In”:
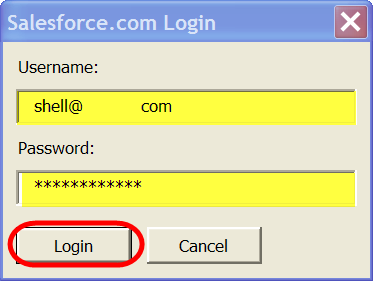
Log In Username Password

Need Token
To login you’ll need the following:
  • User Name (email that you use to login to salesforce)
  • Password:
  • Security Token:
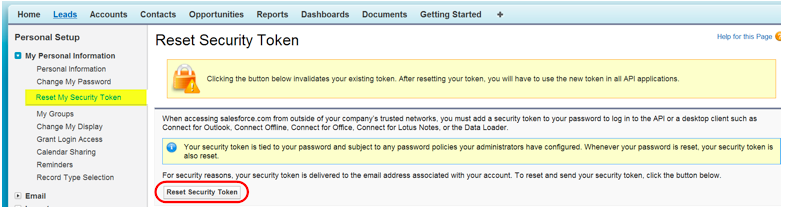
To get your security token you’ll need to go to Setup > Personal Setup > My Personal Information > Reset My Security Token
Reset Token
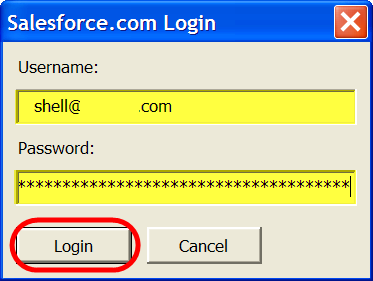
Check the email account associated with your Salesforce.com account. You’ll receive an email with the Token and instruction on how to use the token. Basically, if your password is “myPassword” and your security token is “XXXXXXX”, you will enter “myPasswordXXXXXXX” into the password window.
Login with token
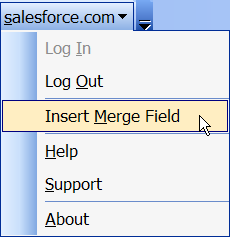
Once logged in, if you go to the Salesforce menu, you can now select fields that will be used to merge Salesforce data into your Word Document:
Insert Mail Merge Field
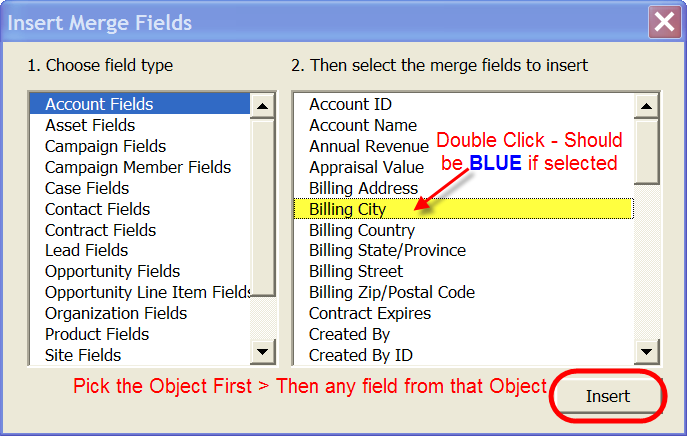
You will then see a field picker interface. First you pick the Object on the left pane, then any of the fields available on that Object from the right pane:
Select Mail Merge field
For example if you wanted to insert the Billing City into this sentence, you would highlight the words Billing City and then use the wizard to insert the mail merge field so it would look like this:
For example if you wanted to insert the Billing City into this sentence, you would highlight the words «ACCOUNT_BILLINGCITY» and then use the wizard to insert the mail merge field so it would look like this…
Repeat the process of selecting and inserting mail merge fields as needed until your document is complete. Here is an example of a template with many mail merge fields ready to upload into Salesforce:
Multiple Mail Merge Fields
Once your Word Document is saved, you’ll need to upload the template into Salesforce.
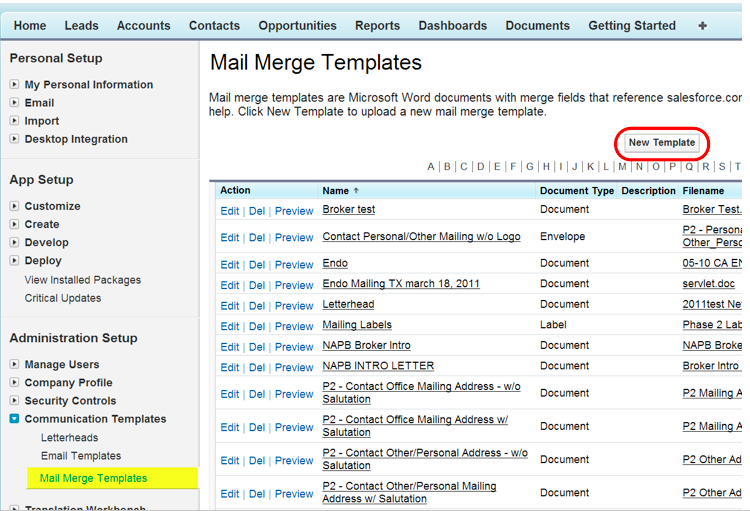
Go to Setup > Administration Setup > Communication Templates > Mail Merge Templates, then in the pane on the right, click “New Template”
Add New Template

Create a name for your new template, browse to the file on you local drive or desktop, and click the “Save” button.
Upload New Template
Your template is now ready for use.
You create a Mail Merge document by navigating in Salesforce to the appropriate record in Salesforce, scrolling down to the Activities History related list section for that record and clicking the “Mail Merge” button.
Mail Merge Related List
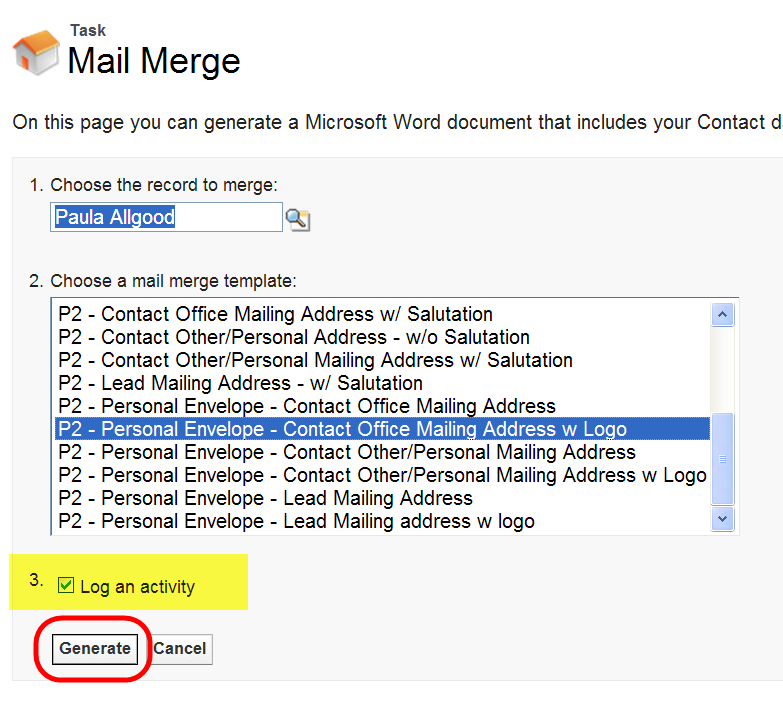
Click the “Mail Merge” button and select the appropriate contact in Step 1 (it should default to the right Contact if that was the record you were viewing when you kicked off the Mail Merge)
Create Mail Merge
In Step 2 select the template
In Step 3 you have the option of recording the Mail Merge as an activity against the record (recommended)
Then click the “Generate” button…

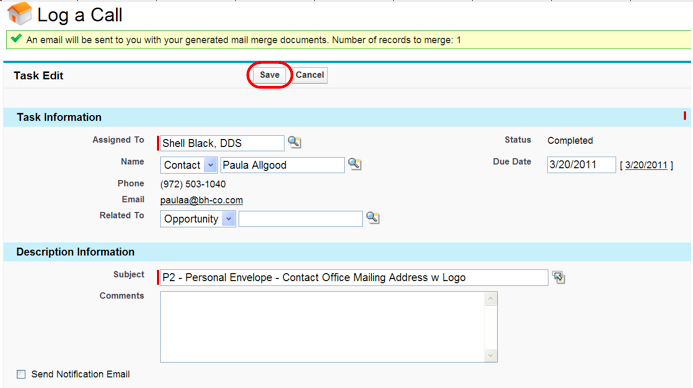
If in Step 3 you selected to log an activity, you will see a screen like this – click “Save”:
Activity Logged

That’s it! In most cases MS Word will fire-up and you can see the Mail Merge.
Sometimes the document will be emailed to you by Salesforce.
Here is an example of the Mail Merge activity logged by Salesforce:
Activity Logged
If you want to learn about the Mass Mail Merge feature, see this tutorial.

NOTE:

The Mail Merge function only pulls data down into MS Word for the Record you are viewing when you create a mail merge. For example, if you are creating a Mail Merge from a Contact record, you cannot pull information from the Account in the same operation.
Also Mail Merge seems to only work with Internet Explorer (as it relies on Active X). I have not found a solution thus far for Mac users. However, you can use a Mac with the Mass Mail Merge feature – go figure.

How to use Substring in Apex Code

Scenario:
We have a string value to be copied from one field in a Standard object to the Custom Object Standard field "Name". Yes you can do this in a formula field but if the objects are not related directly you can not.

So, a little bit about Custom Object regarding the standard field "Name".
Name field in a custom object its length is 80 MAX. No one can change the attribute on this field to go over 80 length.
So since we are utilizing code to do the update, Apex will not automatically cut off the string if it is more then 80. It will submit an error.

Solution:
We utilized substring method in Apex to accomplish anything more then 80 characters going into the name.
Substring Method - "Returns a new String that begins with the character at the specified startIndex and extends to the character at endIndex - 1." Click Here for more on String Methods

To clarify this, if we have a string such as 'ABC' length is 3 characters. If you place this in a substring and you wanted the first 2 characters, it would be 'ABC'.substring(1,3) = 'AB' ... Make it mathically easier, 3-1=2 which gets you the first 2 characters in your string.

Now the catch in code, you would need utilize the actually name of the field instead of placing it in a string.
String ProdName;


Product2 prod = [ SELECT p.ProductCode, p.Name, p.Id, 
FROM Product2 p 
WHERE p.Id =: oppLineItem.PricebookEntry.Product2Id];
 
if(prod.Name.length()>80){
//This would get the first 90 characters of the string
ProdName = prod.Name.SubString(0,80); customobject__c.Name = prodName; }

Change Password via Developer Console in Salesforce without resetting password

Scenario:
      We need to reset a password or change the password on an user utilizing a 3rd party app in salesforce. This user is there for the app only and not really a physical user in the instance. The email for this user is a person who has left the company or is on vacation but you need the app to work.

Solution:
    You can do this 2 ways:

  1. Change the Email of the user in question
  2. Click on Generate Password and click save.
But lets say you can not change the Email of the user because you should not be the owner of the app or you are not part of the app as an admin. Here is where you change using Developer Console.

Go to Setup and Drop it down to Developer Console or sometimes called the System Log


Within the "Logs" tab you will see a button called "Execute".


Click on the text box or white space next to it.

It shall open up another window which is titled "Enter Apex Code"

Place in the following SOQL query:
User usr = [select Id from User where username='test@learn4sfdc.com'];
System.setPassword(usr.Id,'test1234');


Then click on Execute.
It should bring up a success window and you should be good to go.
Now you may need to log in and make sure everything is ok.